
Saturday, 30 April 2011
Homemade tomato sauce

Makes 4 x 500ml capacity screw-cap glass bottles
1 tbs organic olive oil
2 medium organic brown onions, roughly chopped
1 tbs organic salt
12 cups fresh or tinned organic tomatoes, halved
2 organic red capsicum, roughly chopped
4 cloves organic garlic
1 organic celery stalk, roughly chopped
1/2 cup organic raw or brown sugar
1/2 tsp cayenne pepper, if desired
1 tbs paprika, if desired
6 cloves, if desired
1 cinnamon stick, if desired
1 1/2 cups red or white wine vinegar
1. Wash and sterilise bottles and screw-cap lids in boiling water and leave to dry completely.
2. Heat the oil in a large saucepan over medium heat. Add the onions and cook, stirring occasionally, until soft but not caramelised. Add the salt and season well with black pepper.
3. Add tomatoes, capsicum, garlic and celery to the pan and increase to medium-high heat. Cook, stirring, until tomatoes have broken down and vegetables are soft. Remove from heat and allow mixture to cool slightly.
4. Pour the mixture into the bowl of a food processor and process until partially pureed. Strain mixture through a sieve into a jug to remove seeds and tomato skin. Return to the bowl of a food processor and process until finely pureed.
5. Return mixture to the saucepan over medium-low heat. Add sugar, cayenne pepper, paprika, cloves and cinnamon stick; cook, stirring occasionally, for 30 minutes or until sauce thickens.
6. Add the vinegar and continue cooking until the mixture is slightly runnier than your desired result as it will thicken as it cools. Remove the cinnamon stick. Taste and season with salt and pepper.
7. Remove from heat and set aside to cool slightly. Transfer ketchup to a heatproof jug. Using a funnel, pour ketchup among the glass bottles. Allow ketchup to cool in the bottle, then seal tightly with screw-cap lid and label. Store ketchup, unopened, for up to 12 months. After opening, store in the fridge for up to 12 weeks.
Recipe from note book magazine.
Thursday, 28 April 2011
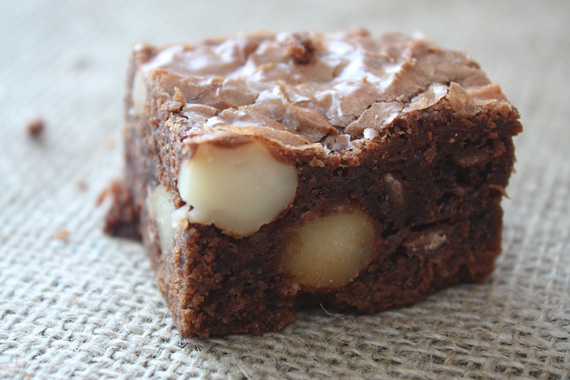
Chocolate brownies
150g butter
150g coconut oil
600g dark chocolate, chopped
1/2 cup honey
6 fresh dates cut and soaked in 1/4 cup of water overnight
4 eggs, lightly whisked
1 cups rice flour
2 cups besan flour (chickpea flour)
1/2 cup (125g) sour cream
1 cup (145g) toasted macadamia nuts, chopped
1. Preheat oven to 150°C. Grease and line the base and sides of a cake pan with baking paper.
2. Combine the butter, oil and dark chocolate in a saucepan over low heat. Cook, stirring, for 5 minutes or until chocolate melts and mixture is smooth. Remove from heat and set aside for 5 minutes to cool.
3. In food processer chop dates until smooth. Then combine honey, chocolate mixture and eggs.
4. Add the flour and sour cream and stir to combine. Add the macadamia nuts.
3. Pour mixture into the pan. Bake for 45 minutes or until just cooked through. Remove from oven and set aside in pan to cool completely. Use a sharp knife to trim the edges. Cut into 3cm square pieces. Yummy!
Tuesday, 26 April 2011
Canvas art

To create this all you need is to
1. Mark on a canvas a checker board pattern
2. Paint all alternating squares in one direction then allow paint to dry
3. Paint remaining squares in the other direction
Finished
Instructions sourced from here.
Sunday, 24 April 2011
Fabric box


This fabric twist box is called a PJ Pocket Pillow made by modern twist.


I found instructions to make a paper box of the same type. These instructions are from the British origami society.

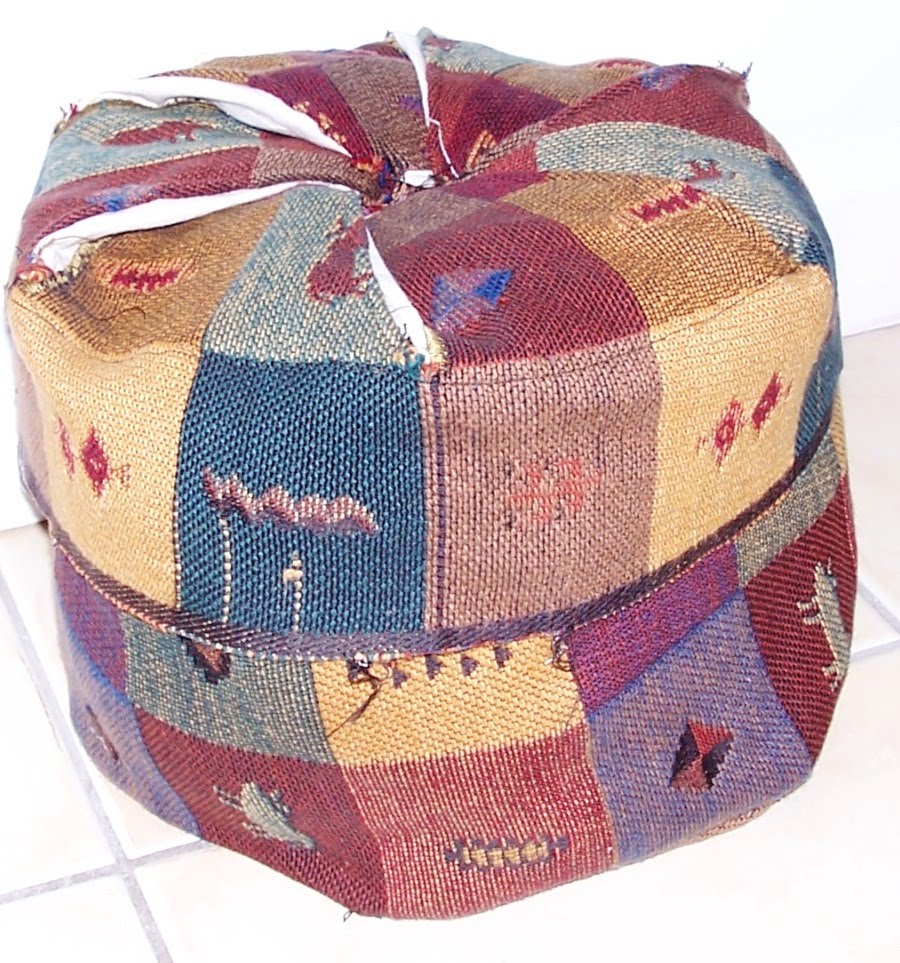
I initial made my own pattern up and ended up with the above bag. It looks ok! But I will try again with the paper pattern which I think will be more successful.
Friday, 22 April 2011
Sewing Scissors
My new scissors arn't they adoriable. These are for cutting small threads as I was having difficulty using my large ones as I always seemed to miss place them. Not anymore these will come in handy. Bonus they also look great.
Next for other home uses I may invest in some of these from here.


Next for other home uses I may invest in some of these from here.
Wednesday, 20 April 2011
Jewellery organising

What is this metal thing? Well I acutallly have no idea what it origionally was but now it is my earing holder. The above picture is of it standing up but I had a great idea when I started this post that I could also hang it upside down.


I have so much jewelry which is all essential (well acutally I just am a collector). Because of the volume I need to keep it stored on two shelves.
As my second earing holder I have a spanish item which I found at a market which was not origionally a earing holder.
As my second earing holder I have a spanish item which I found at a market which was not origionally a earing holder.


My necklace box is very well ordered so I am able to find everything.

This is the overall order which I believe works very well. I bought most of my containers at thrift stores or markets.
More ideas can be found at home life.
Monday, 18 April 2011
Shoe drop
The first thing I do when I get home is to take my shoes off and they never end up in the correct place. They get lost under my bed and all sorts of places.


I found this wooden wine rack at an op shop one lunch break at work.

It has a really nice decrative carving.

I don't drink so I though why not make it my shoe stant it would only hold flats and sandles. I think it worked out nicely and I can always find my shoes when I'm running out the door to work.
Saturday, 16 April 2011
Hanging fabric 1
Skalves
A great way to decorate a bed head is by hanging some scarves. I would use normal sewing pins to hold them up (so not to damage the wall).
Or another option for displaying skalves which would make it easy to grab one when walking out the door is to hand a number on small frame hooks along the hall.
Handkerchiefs
A good way of displaying handkerchiefs is to frame them although some of the best bits of the older style ones are the embroidered edges.
Banner
This picture shows a small fabric flag banner hanging which I think is quite cute (although I would personally make a banner for a celebrations or a kids room).
There are loads of patterns for making your own fabic banner. Here is a tutorial from miko design.
A great way to decorate a bed head is by hanging some scarves. I would use normal sewing pins to hold them up (so not to damage the wall).

Or another option for displaying skalves which would make it easy to grab one when walking out the door is to hand a number on small frame hooks along the hall.

Handkerchiefs
A good way of displaying handkerchiefs is to frame them although some of the best bits of the older style ones are the embroidered edges.

Banner
This picture shows a small fabric flag banner hanging which I think is quite cute (although I would personally make a banner for a celebrations or a kids room).
There are loads of patterns for making your own fabic banner. Here is a tutorial from miko design.

Thursday, 14 April 2011
Colour coded organisation
Book shelves colour coded look soo amazing. I just wish I had that many books. Acutally I am very glad I don't have that many books as I would need a larger house.
As you alread know I love boxes so my colour coded book shelf was the perfect place to display some of my boxes and the colour codes matched perfectly. I can't remember if I chose these boxes for there colour or the books for theres. It all happend at the one time and worked out perfectly.
I was so inspired I decided my wardrobe would have the same colour coded order. I started with my shirts and then lost the inspireation. Project to be continued.
P.S. I often leave projects half done which will be good with this blog as hopefully it will give me the motivation I need to get them finished. Can't wait to finish them all! Well I better get started.
 |
| (Image from: Flickr) |

 |
| (Source:mighty minerva and robaroundbooks.com) |
 |
| (source: decorating ideas) |
 |
| (source: Ali Par) |
My miniature colour coded book shelf.
 |
| (source: Ali Par) |
 |
| (source: Ali Par) |
P.S. I often leave projects half done which will be good with this blog as hopefully it will give me the motivation I need to get them finished. Can't wait to finish them all! Well I better get started.
Succulent garden
Succulent frame
For instructions on how to make this succulent frame click here.
Succulent ball
Click here for the how to.
Succulents tiered
If you haven't had enough of succulents you can try the tiered by clicking here.
Table centre piece
How to make this living table centre piece can be found at here.
Vertical garden
Click here for the how to.

For instructions on how to make this succulent frame click here.
Succulent ball

Click here for the how to.
Succulents tiered

If you haven't had enough of succulents you can try the tiered by clicking here.
Table centre piece

How to make this living table centre piece can be found at here.
Vertical garden
Click here for the how to.

Tuesday, 12 April 2011
Stiching 1
 |
| (source: needle n thread) |
 |
| (source: flosiepoos) |
 |
| (source 1. my transfers 2.moxie doll 3. sublime stitching 4. daddys little hurl's inspired by lark crafts) |
 |
| (source: 1. moxie doll, 2. three buttons 3. kay lacoo) |

(source: lachouettejolie)
When I was butting this post together I came accross this how cute and colourful. I want to make one of my own.
Monday, 11 April 2011
Hearts
Hearts can be found everywhere. I went to a bed and breakfast under one of the glass house mountains for my birthday on Sunday. The owners had a dog with a heart on so I took a photo.
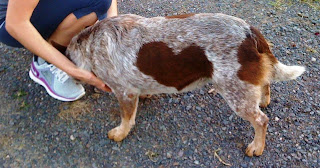
{Image from me}
You can make a heart in a cake follow the instructions at here.
You can even put up your photos in a heart shape.

{Image from me}


You can make a heart in a cake follow the instructions at here.
You can even put up your photos in a heart shape.


Saturday, 9 April 2011
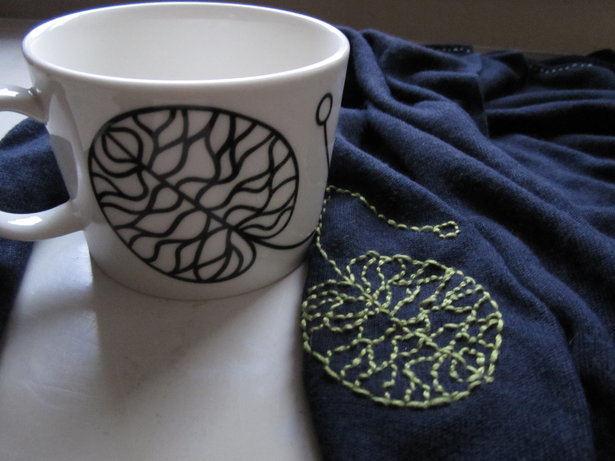
I love Embroidery
Op shop hand embroidery
I love to collect hand embroidered peices which I didn't have to spend hours making.
 |
| (source: Ali-Par) |
 |
| (source: Ali-Par) |
I found all of these beautiful hand embroidered peices at op shops. I love them soo much! The one on the left has a lot of texture. The right one uses many different types of stiches to make the tree, bird and flowers. They would have taken a long time to make. All I needed to do was take them out of there frames, give everything a good clean then decide where to display them.
 |
| (source: Ali-Par) |
Mona Lisa hand stiched I couldn't believe the amount of work in this frame it is about 60cm tall.
Beautiful work
 |
| (source: average jane crafter) |
This hand embroidered moon was made by average jane crafter it made me look at embroidering in a whole different way. This is more of an art form and a little abstract and not so precise.
Subscribe to:
Posts (Atom)